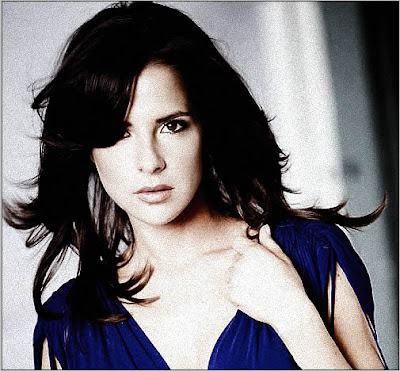
High Contrast Photo Effect
Step 2: Duplicate the layer by pressing Ctrl+J.
Now apply the desaturate on the duplicated layer. Go to Image> Adjustments> Desaturate or press Ctrl+Shift+U.
Step 3: Now duplicate the desaturate layer by pressing Ctrl+J. We will see we have two black and white layers.
Step 4: Set the new desaturate layer blending mode to 'Screen' and Opacity to '55%'.
Step 5: Duplicate the original background layer by pressing Ctrl+J and move it to the top of the layers palette.
Change the background duplicate layer blending mode to 'Overlay'and Opacity to '75%'.
After that your Image looks like:
Step 6: Merge all layers onto a new layer at the top of the layers palette by pressing Ctrl+Shift+Alt+E.
Step 7: Go to Filter> Noise> Add Noise and use this settings:
Step 8: Apply sharpen to enhance the noise. Go to Filter> Sharpen> Smart Sharpen and use this setting:
Step 8: Click on the Create a new fill or adjustment layer icon at the bottom of the Layers palette and select curves.
When the Curves dialog box appears, simply click OK, do not change anything.
Step 9: Set the layer blending mode to 'Multiply' and Opacity to '80%'.


6 Comments:
well done, awesome!
By Anonymous, At
April 28, 2009 at 1:27 AM
nice photo and brilliant tutorial :)
By Anonymous, At
April 28, 2009 at 3:38 AM
good..it's a very useful tutorial..
By Sujith Edassery, At
July 5, 2009 at 1:19 AM
Well I have been hard at work trying to mine detail using "Selects (Hi/Mid/Shadow)" and "Levels" as I thought the game was to try to max the detail in a beautiful composite.
Here we seem to end up with a dark, somewhat underexposed mid-shadow image + highlights.
I must be missing something as I ran this over a "horse head over snowy rail fence photo" and did not see an gold medal image. Color was of course almost gone.
Anyway, I will keep at it.
Old Man Gee Two
By Anonymous, At
March 6, 2010 at 9:22 AM
Cool tutorial for High Contrast Photo Effect . thanks for step by step details
Image Masking Service | Clipping Path Service
clipping path | Photo Cut Out
By Remove White Background, At
May 16, 2016 at 10:46 AM
Awesome high contrast making tutorial. It helped me a lot. Thanks
By Robert Smith, At
June 18, 2018 at 11:07 PM
Post a Comment
<< Home