Luminosity Effect
Today's I will show you how to create Luminosity effect very quickly.
Step 1: Let's start.
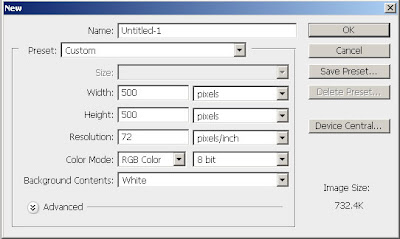
Step 2: Press 'D' to reset your color palette. Press Alt+Backspace to change the background color to black.

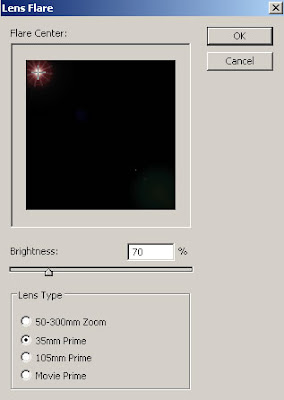
Step 3: Go to Filter> Render> Lens Flare and use the following settings and in the top-left corner.
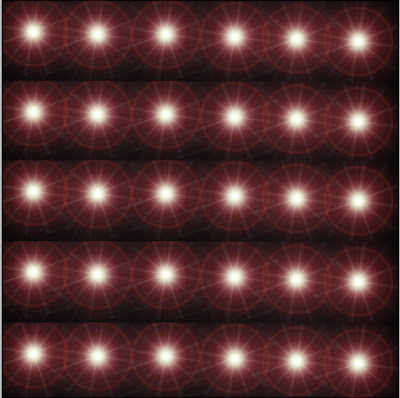
Now repeat this, bare with me here, a good number of times to fill up your canvas like this.
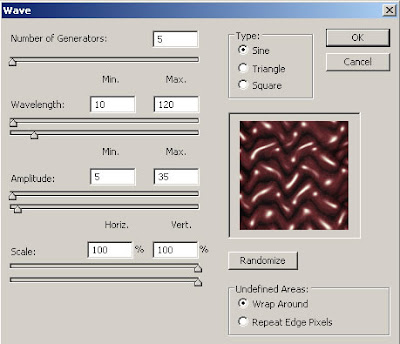
Step 4: Go to Filter> Distort> Wave and use these setting:
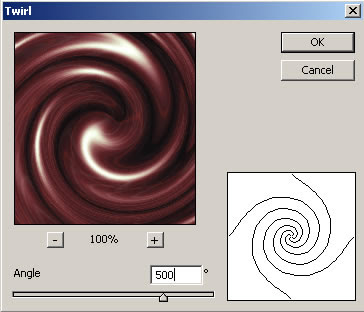
Step 5: Duplicate the layer by pressing Ctrl+J and go to Filter> Distort> Twirl and use these settings:
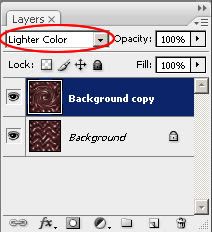
Step 6: Set the layer blending mode to 'Lighter Color'.
Step 7: Merge the layers together by pressing Ctrl+E.
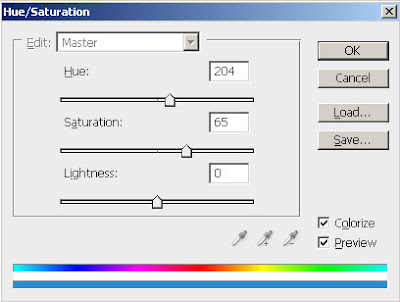
It's time to color your effect, so go to Image> Adjustments> Hue/Saturation or press Ctrl+U and apply these following setting:
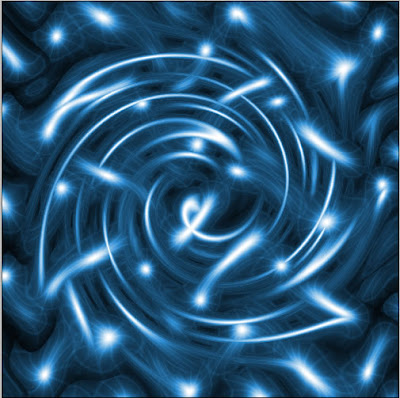
Here's is the Final Result!:
Step 1: Let's start.

Step 2: Press 'D' to reset your color palette. Press Alt+Backspace to change the background color to black.

Step 3: Go to Filter> Render> Lens Flare and use the following settings and in the top-left corner.

Now repeat this, bare with me here, a good number of times to fill up your canvas like this.

Step 4: Go to Filter> Distort> Wave and use these setting:

Step 5: Duplicate the layer by pressing Ctrl+J and go to Filter> Distort> Twirl and use these settings:

Step 6: Set the layer blending mode to 'Lighter Color'.

Step 7: Merge the layers together by pressing Ctrl+E.
It's time to color your effect, so go to Image> Adjustments> Hue/Saturation or press Ctrl+U and apply these following setting:

Here's is the Final Result!:

8 Comments:
great great effect, fantastic blog!
By Anonymous, At
April 16, 2009 at 6:30 AM
Anonymous, At
April 16, 2009 at 6:30 AM
Nice ! Simple yet better effect !
Thanks for sharing !
By Evaritus Lau, At
April 18, 2009 at 6:38 AM
Evaritus Lau, At
April 18, 2009 at 6:38 AM
cool effect :D but one thing, i couldn't do hue 204, only up to 180 :S
By Anonymous, At
April 18, 2009 at 7:52 AM
Anonymous, At
April 18, 2009 at 7:52 AM
If you want to set it to 204 you must also select colorize in step seven. :) it looks nice im going to save it while I think of some ideas and look at more tuts.
By Green, At
April 18, 2009 at 10:57 AM
Green, At
April 18, 2009 at 10:57 AM
A nice and easy tutorial to follow.
By photo retouching, At
May 2, 2009 at 11:19 PM
photo retouching, At
May 2, 2009 at 11:19 PM
If you change the layer properties in step 6 to "color dodge" instead of the other one it gives it a pretty cool effect.
Great tutorial!
By Anonymous, At
May 11, 2009 at 1:41 AM
Anonymous, At
May 11, 2009 at 1:41 AM
really great job for Luminosity Effect. thanks for your tutorials
Remove White Background
By Clipping Path, At
May 11, 2016 at 3:08 PM
Clipping Path, At
May 11, 2016 at 3:08 PM
Great article and thanks for your work. You made an article that is interesting.
clipping path service
Background Removal
By Robert Smith, At
June 5, 2018 at 11:24 PM
Robert Smith, At
June 5, 2018 at 11:24 PM
Post a Comment
<< Home