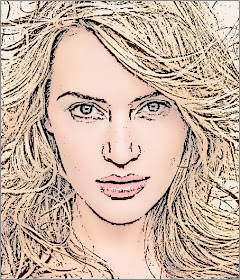
Step 2: Duplicate the layer by pressing Ctrl+J.
Now apply the desaturate on the duplicated layer. Go to Image> Adjustments> Desaturate or press Ctrl+Shift+U.
Step 3: Go to Filter> Other> High Pass and these settings:
Step 4: Now go to Image> Adjustments> Threshold and apply these settings:
Step 5: Change the duplicate layer Opacity to '67%'.
Step 6: Choose the Background layer and Click "Create new fill or adjustment layer" and select Hue/Saturation.
And now set the color to give your photo more comic art.
I use these following setting:


8 comments:
awesome tutorial, easy to follow :)
excellent
very good and easy to do.
thank.
super cool...
amazing...this is what im looking for... this is good to post it in friendster hehehe
Nice converssion photo into Pop Art tutorial. thanks
great job done. photo into Pop Art tutorial. thanks
Image Masking Service | Clipping Path Service
clipping path | Photo Cut Out
Another excellent tutorial. I have learned a lot today from this tutorial. Really it was helpful
Raster To vector
clipping path service
Background Removal
Post a Comment