Old and Vintage Photo
To begin with, what sort of photo would make a good grunge brush? Anything really. You can take a shadow or highlight or color selection, separate those elements from the photo and create a brush fairly easily. For this example, I’m going to use the tech pattern image and create my brush.
In this photoshop tutorial we are going to create an old and vintage photo.

For the first brush creation technique, select a color range for the brush pattern. To do this, go to Select> Color Range. Use the Eyedropper to select a spot on the image… any will do really, and with this technique you can come up with oodles of the image… any will do really, and with this technique you can come up with oodles of patterns from a single image. Hold down the Shift key to add to your selection, expanding the detail in the brush. Use the viewer to check the selection. Once you are happy that the brush has enough of the photo elements you want or would like to try, click OK.

Once you click OK, the selected area will have those marching ants around the color ranges you chose.

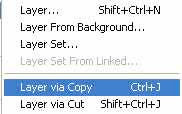
Copy and paste the selection to a new layer.
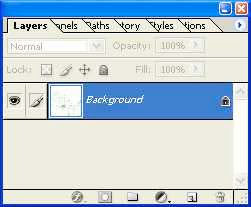
Create a new layer just above the background and fill it with white.
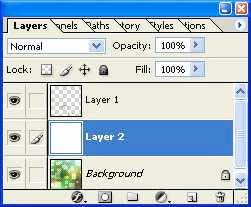
Your brush pattern will now be visible against the white layer.

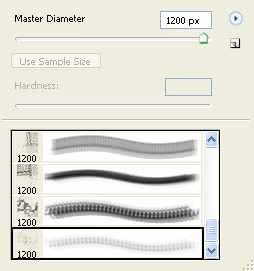
In this instance, the image I am creating my brush from is 300 ppi. Photoshop does not like that at all, leaving the ‘Define Brush’ option grayed out. That’s fine, as we can reduce the size of the image to a size Photoshop likes, and then simply increase the size of the brush by adjusting the Master Diameter of the brush when we are ready to use it.
I’ll go ahead and reduce the image size to 100 ppi: Photoshop likes that a whole lot
better.

Now I’ll simply flatten the image…
open the Edit menu and select Define Brush from the list. A dialog box appears
allowing me to name the brush.

When OK is clicked, the new brush is saved to the bottom of the loaded Brush Presets.
So what can you do with this new fangled dotted brush? Aging a photo is always a good bet. Here’s an image ready for some blemishes.

I don’t really want to mess up the actual photo layers, so a new layer will work for mypurposes. I’ll go ahead and name it something fancy.
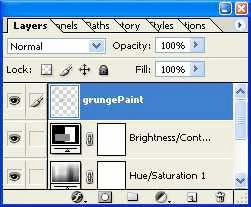
When applying the grunge paint (I’m using black), be careful not to drag the brush. By simply holding the mouse in one spot (after increasing the size as needed) and clicking a few times to darken the paint if the brush settings are less than, say, 70% opacity, I can get a fairly speckled effect that helps add age.

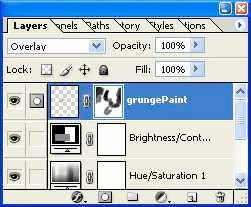
Changing the Blend mode of the paint layer to Overlay helps decrease the harshness of the paint and blend it into the surface of the photo.

It just occurred to me, looking at the pattern on the model’s face, that instead of aging the image you could simply reduce the amount of dots with a mask and effectively give her a tattoo on the cheek, or maybe imply mardi-gras make-up.
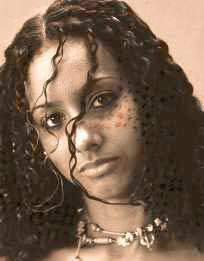
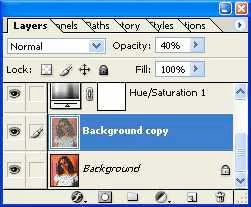
Let’s stick with the aged photo effect. By adding some grain to a copy of the background layer (placed beneath an adjustment layer I created for the sepia-style tone) and applying some grain, the age effect is advanced further.

Then to reduce the amount of grain (providing it is a bit overwhelming), I’ll simply reduce the Opacity for that layer to taste.
Another step to add age is to apply an inner glow to the same layer the grain was applied to. My settings to make an effective brown ‘glow’ around the edges are seen here.

Clicking OK, I get this effect:

By creating and applying a few more brushes over varying color, and adding a tear effect.

In this photoshop tutorial we are going to create an old and vintage photo.

For the first brush creation technique, select a color range for the brush pattern. To do this, go to Select> Color Range. Use the Eyedropper to select a spot on the image… any will do really, and with this technique you can come up with oodles of the image… any will do really, and with this technique you can come up with oodles of patterns from a single image. Hold down the Shift key to add to your selection, expanding the detail in the brush. Use the viewer to check the selection. Once you are happy that the brush has enough of the photo elements you want or would like to try, click OK.

Once you click OK, the selected area will have those marching ants around the color ranges you chose.

Copy and paste the selection to a new layer.

Create a new layer just above the background and fill it with white.

Your brush pattern will now be visible against the white layer.

In this instance, the image I am creating my brush from is 300 ppi. Photoshop does not like that at all, leaving the ‘Define Brush’ option grayed out. That’s fine, as we can reduce the size of the image to a size Photoshop likes, and then simply increase the size of the brush by adjusting the Master Diameter of the brush when we are ready to use it.
I’ll go ahead and reduce the image size to 100 ppi: Photoshop likes that a whole lot
better.

Now I’ll simply flatten the image…

open the Edit menu and select Define Brush from the list. A dialog box appears
allowing me to name the brush.

When OK is clicked, the new brush is saved to the bottom of the loaded Brush Presets.

So what can you do with this new fangled dotted brush? Aging a photo is always a good bet. Here’s an image ready for some blemishes.

I don’t really want to mess up the actual photo layers, so a new layer will work for mypurposes. I’ll go ahead and name it something fancy.

When applying the grunge paint (I’m using black), be careful not to drag the brush. By simply holding the mouse in one spot (after increasing the size as needed) and clicking a few times to darken the paint if the brush settings are less than, say, 70% opacity, I can get a fairly speckled effect that helps add age.

Changing the Blend mode of the paint layer to Overlay helps decrease the harshness of the paint and blend it into the surface of the photo.

It just occurred to me, looking at the pattern on the model’s face, that instead of aging the image you could simply reduce the amount of dots with a mask and effectively give her a tattoo on the cheek, or maybe imply mardi-gras make-up.


Let’s stick with the aged photo effect. By adding some grain to a copy of the background layer (placed beneath an adjustment layer I created for the sepia-style tone) and applying some grain, the age effect is advanced further.

Then to reduce the amount of grain (providing it is a bit overwhelming), I’ll simply reduce the Opacity for that layer to taste.

Another step to add age is to apply an inner glow to the same layer the grain was applied to. My settings to make an effective brown ‘glow’ around the edges are seen here.

Clicking OK, I get this effect:

By creating and applying a few more brushes over varying color, and adding a tear effect.

1 Comments:
Hey! V nice tut =)
http://www.q-stom.ru
By Unknown, At
September 11, 2009 at 12:09 PM
Unknown, At
September 11, 2009 at 12:09 PM
Post a Comment
<< Home