Burn Face
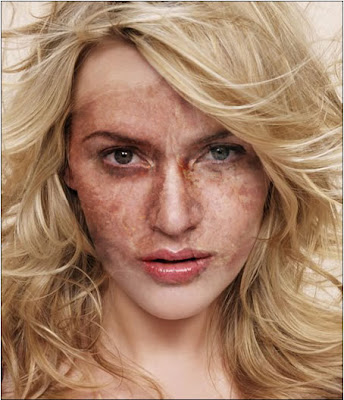
In this tutorial you will learn how to make a realistic Burn Face in Photoshop.
It also covers the basics of texturizing an image.
I have three pictures.
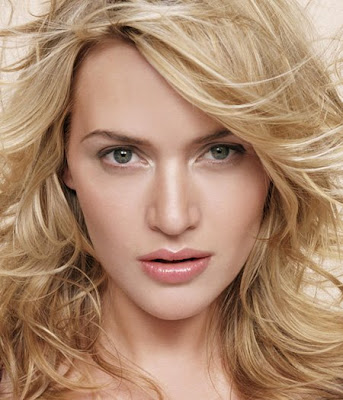
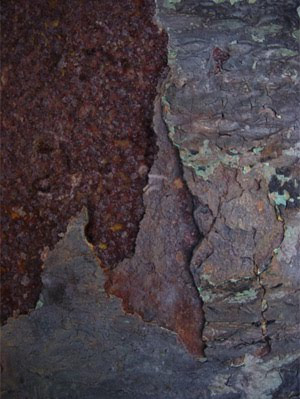
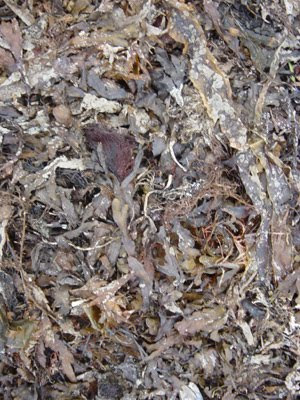
Step 1
Open the picture of girl in Photoshop.
Also open the texture in Photoshop. Cut the texture and paste it into the picture of girl. Place it on top of her face asshown on figure below.
Help
You can cut and paste by doing the following:
- Activate the window with the picture which needs to be cut.
- Press Ctrl+A to mark the whole picture.
- Press Ctrl+X to cut the picture.
- Select the window with girl and press Ctrl+V to insert the cutted image.
Step 2
Now, press the button where the red arrow is pointing add a layer mask. Click once on the layer mask to activate it.
Choose the brush tool, pick a soft brush of 100px. and start painting with black to erase the area as shown on figure.
Tips: When painting black on the mask, you delete part of the image. Painting white reveals it again. You don't delete the picture itself, which is the smart thing working with masks.
Step 3
Change the blending mode of the texture layer to soft light.
Step 4
Open 2nd texture. Desaturate the image by pressing Ctrl+U.
Repeat step 1 to step 3: Cut & paste, place on top of her face, add mask.
Change blending mode to soft light.
Turn opacity of this texture layer down to 30% in the layer panel.
Step 5
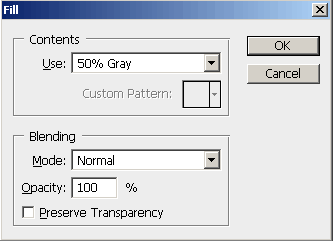
We will add some more touch-up. Choose Edit> Fill> Fill with 50% grey.
Press OK. Choose overlay from the layers panel, and the grey disappears.
Pick the dodge tool with a brush of 2-3px and exposure around 40-50%. Draw with the dodge tool along the edges of the burn face. And use the burn tool in the shadows of the wound.
Play around with different exposures, different brush sizes and different ranges.
Scary/Burn Face


1 Comments:
It's a very effective tutorial. I like your tutorial. You should post some more helpful post in future. Thanks
By Robert Smith, At
June 30, 2018 at 2:53 AM
Post a Comment
<< Home