Burn Photo
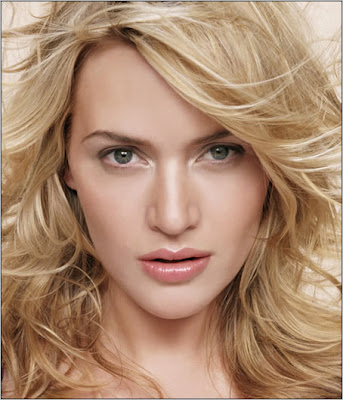
Learn how to convert your photos into BURN/HOT Photo Effect.
Step 2: First we apply Hue/Saturation, go to Image> Adjustments> Hue/Saturation or press Ctrl+U and apply these following setting: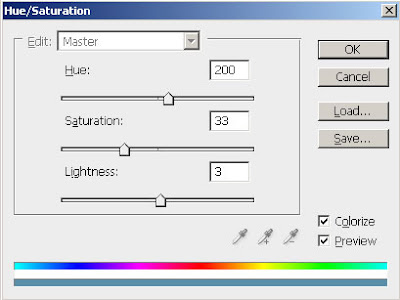
Step 3: Duplicate the layer by pressing Ctrl+J and go to Filter> Blur> Gaussian Blur and apply these settings: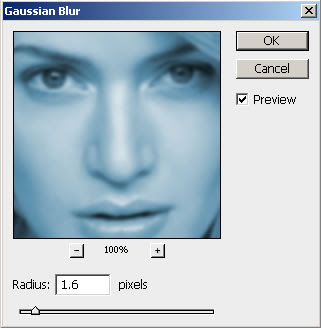
Step 4: Set the layer blending mode to 'Overlay'.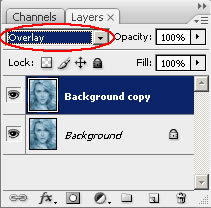
Step 5: Merge the layers together by pressing Ctrl+E. Again duplicate the layer and go to Filter> Blur> Motion Blur and apply these following setting: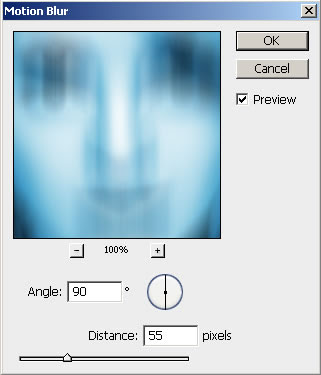
Step 6: Set the layer blending mode to 'Overlay' and merge the layer together.
After this your Image looks like this: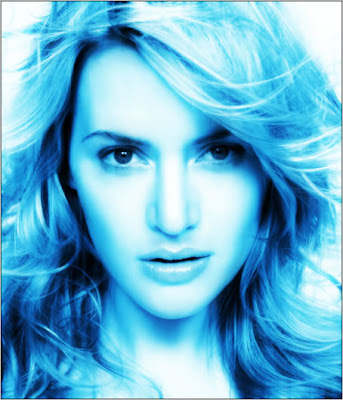
Step 7: Create a new layer and fill with white using Paint Bucket Tool.
Set this layer mode to 'Overlay' and do not merge.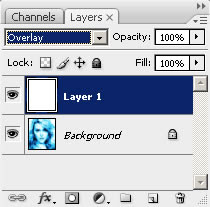
Step 8: Press 'D' to reset your color palette. Set your foreground color to #000099 and background to white. Create a new layer and fill with this color (#000099).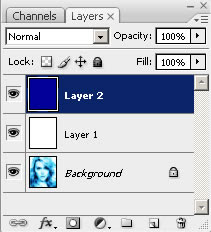
Step 9: Go to Filter> Render> Clouds. Set the layer blending mode to 'Overlay' and Opacity on this layer to 57%.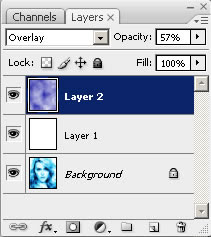
Step 10: In this step create a new layer again and fill it with white. Set the layer blending mode on this layer to 'Difference'.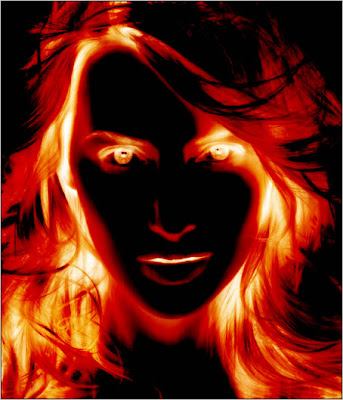
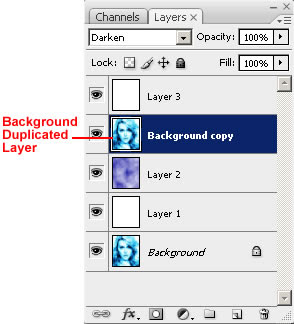
Step 11: In the Final step duplicate your background layer. Move this layer to 2nd from the top under white layer and set the layer blending mode to 'Darken'.
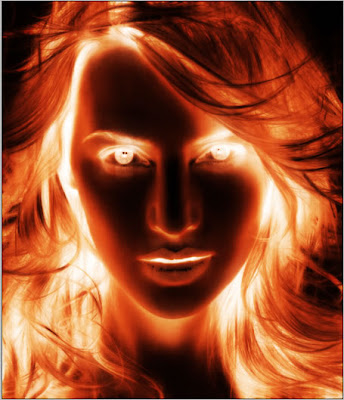
Here's is the Final Result!:
3 Comments:
How do you create a layer mask when your using photoshop elements 8
By Anonymous, At
March 26, 2010 at 4:49 PM
I followed the steps here to the letter, but I did not have the final result as shown here on this tutorial. I don't know why!! I am using CS4.
It would be great if it works.
By Anonymous, At
April 23, 2010 at 10:39 PM
hey this is amaziiiinngg yarrrrr..
i like it and i foloow on this step .. thanx dear
yourstruly
risky...(tejas mistry)
By Unknown, At
July 4, 2010 at 11:37 PM
Post a Comment
<< Home