Simply Retouch
Learn how to retouch your photos in photoshop.
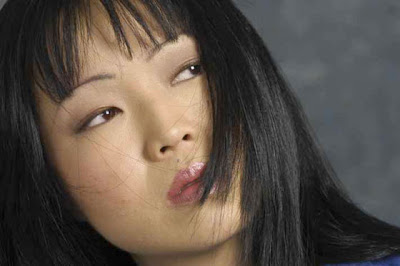
Open a photo.
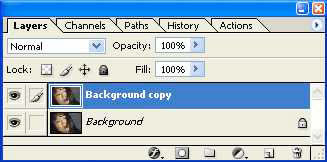
First, as always, duplicate the Background layer.
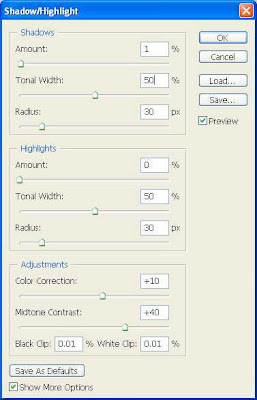
Go to Image> Adjustments> Shadow/Highlight. To darken the shadows I really only need to move the Shadows Amount slider to the left: in this case a setting of 1% works. I won’t mess with the highlights, but I am increasing the Color Correction slider-setting to +10, and adjusting the Midtone Contrast to a setting of +40. Click OK.
Just that simple adjustment has already brightened the skin and further darkened the hair and background. Let’s keep going with this though.
A cool trick to separate the light pixels, or highlights, and place them in a separate layer. To do this the shortcut key combination CTRL+ALT+ ~ (Tilde, next to the 1 key) for PC or OPTION+COMMAND+ ~ to select the highlights. Then simply Copy and paste them into a new layer. Command/Control+Click the new layer to select the highlights.
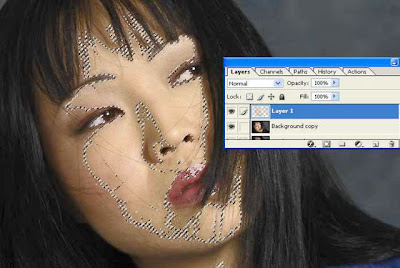
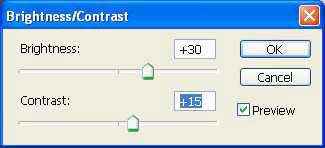
Now you can adjust the highlights separately from the rest of the photo. For instance, an increase in Brightness/Contrast should work well for this tutorial. Here are my settings applied to the Highlights layer.
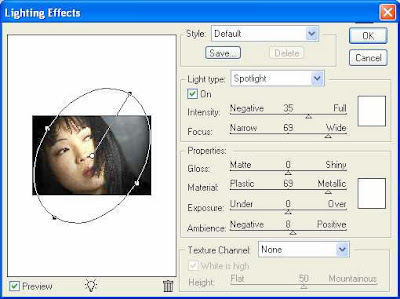
Let’s add one more lighting trick to give the subject the attention she deserves. A simple Lighting Effects filter application should do the trick.

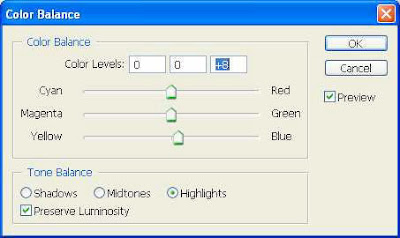
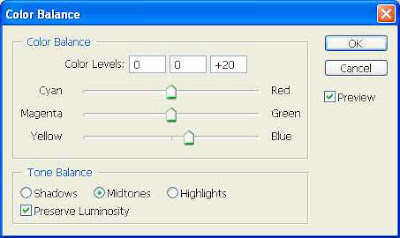
After all that, the one problem I think should be addressed is the increase of the yellow cast. By creating a Color Balance adjustment layer and reducing the Yellow/increasing the Blue just a bit in the Highlights and Midtones, we should be able to get a warmer color and a bit more natural.
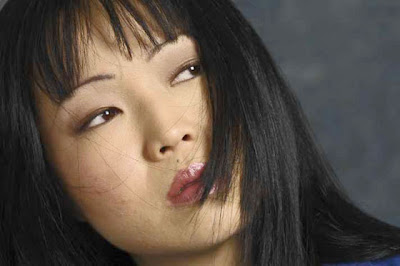
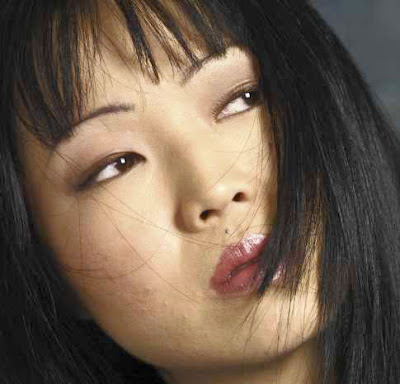
Here’s the Final!
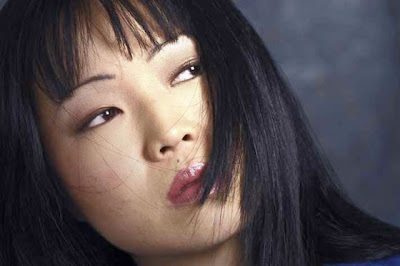
Open a photo.

First, as always, duplicate the Background layer.

Go to Image> Adjustments> Shadow/Highlight. To darken the shadows I really only need to move the Shadows Amount slider to the left: in this case a setting of 1% works. I won’t mess with the highlights, but I am increasing the Color Correction slider-setting to +10, and adjusting the Midtone Contrast to a setting of +40. Click OK.


Just that simple adjustment has already brightened the skin and further darkened the hair and background. Let’s keep going with this though.
A cool trick to separate the light pixels, or highlights, and place them in a separate layer. To do this the shortcut key combination CTRL+ALT+ ~ (Tilde, next to the 1 key) for PC or OPTION+COMMAND+ ~ to select the highlights. Then simply Copy and paste them into a new layer. Command/Control+Click the new layer to select the highlights.

Now you can adjust the highlights separately from the rest of the photo. For instance, an increase in Brightness/Contrast should work well for this tutorial. Here are my settings applied to the Highlights layer.


Let’s add one more lighting trick to give the subject the attention she deserves. A simple Lighting Effects filter application should do the trick.


After all that, the one problem I think should be addressed is the increase of the yellow cast. By creating a Color Balance adjustment layer and reducing the Yellow/increasing the Blue just a bit in the Highlights and Midtones, we should be able to get a warmer color and a bit more natural.


Here’s the Final!

3 Comments:
à quoi correspond le racourcis????
"ctrl+alt+~"
merci pour ce bel effet
By Anonymous, At
March 9, 2010 at 8:04 AM
Anonymous, At
March 9, 2010 at 8:04 AM
à quoi correspond le racourcis????
"ctrl+alt+~"
merci pour ce bel effet
By Anonymous, At
March 9, 2010 at 8:06 AM
Anonymous, At
March 9, 2010 at 8:06 AM
eysy to use and apply thx a million!!!
By Anonymous, At
March 14, 2010 at 3:38 AM
Anonymous, At
March 14, 2010 at 3:38 AM
Post a Comment
<< Home