In this photoshop tutorial we are going to show you how to create dreamy effect in your photographs. This effect can be archived in many different ways, and the one im going to show you now is very easy, but extremely useful.
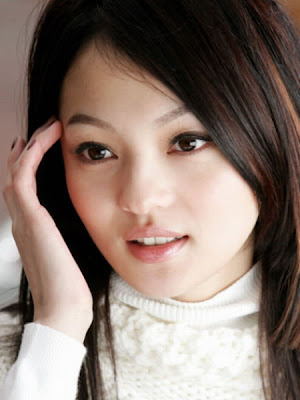
Step 1: In first step we find a picture that we want to use.
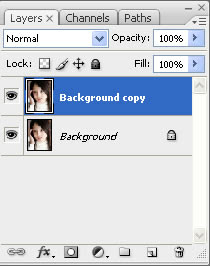
Step 2: Now make a copy of the original layer.
Step 3: Select the layer you just made and go to Filters => Others => Maximum and give it about 3-4 pixels. Click OK.

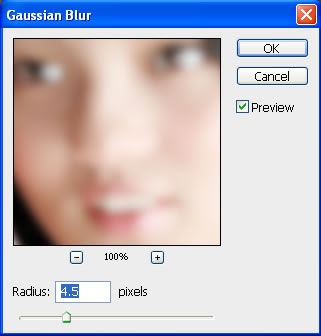
Step 4: Now apply Gaussian blur, Filters => Blur => Gaussian Blur and set it to about 4-5 pixels. Click OK.
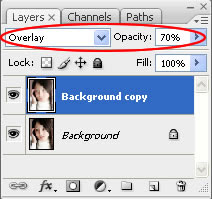
Step 5: In this step set the layer mode to "overlay" and the opacity to 70%.
Step 6: So, the image looks much better now but there are still few things to do.
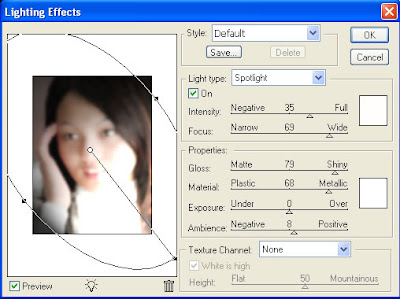
Go to Filters => Render => Lighting Effects and use the same settings as the image below.
Step 7: Now make a new layer and place it at the top. Make it into an adjustment layer by selecting the black and white circle at the bottom of you layer pallette.
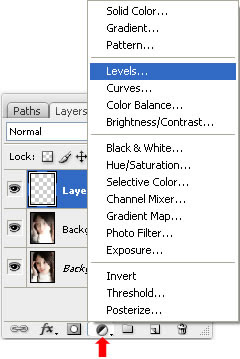
Now Select "Levels" and adjust according to the image below. Then click ok.

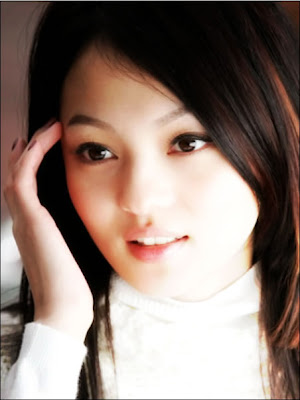
Here's is the Final outcome
Step 1: In first step we find a picture that we want to use.

Step 2: Now make a copy of the original layer.

Step 3: Select the layer you just made and go to Filters => Others => Maximum and give it about 3-4 pixels. Click OK.

Step 4: Now apply Gaussian blur, Filters => Blur => Gaussian Blur and set it to about 4-5 pixels. Click OK.

Step 5: In this step set the layer mode to "overlay" and the opacity to 70%.

Step 6: So, the image looks much better now but there are still few things to do.
Go to Filters => Render => Lighting Effects and use the same settings as the image below.

Step 7: Now make a new layer and place it at the top. Make it into an adjustment layer by selecting the black and white circle at the bottom of you layer pallette.

Now Select "Levels" and adjust according to the image below. Then click ok.

Here's is the Final outcome

5 Comments:
That is an awful effect. It has ruined the original image.
By James, At
May 4, 2009 at 8:50 AM
James, At
May 4, 2009 at 8:50 AM
This is a nice effect. Thank you
By Anonymous, At
May 6, 2010 at 8:01 AM
Anonymous, At
May 6, 2010 at 8:01 AM
This affect is Great.. not sure what the first reader did wrong. Maybe it was his/her source photo.. that can make a diff on how the end result will be. Thanks!
By Anonymous, At
March 2, 2012 at 10:30 AM
Anonymous, At
March 2, 2012 at 10:30 AM
doesn't work with cs. I can't use the blurs on the first layer. It only works on the original.
By Anonymous, At
March 9, 2012 at 4:14 AM
Anonymous, At
March 9, 2012 at 4:14 AM
That is simple and really awesome :)
By Anonymous, At
November 24, 2013 at 2:45 AM
Anonymous, At
November 24, 2013 at 2:45 AM
Post a Comment
<< Home