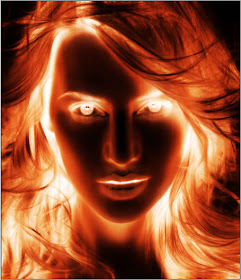
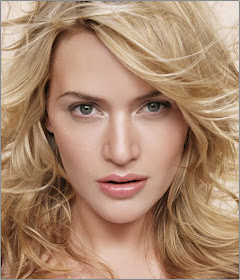
Learn how to convert your photos into HOT Photo Effect.
Step 2: First we apply Hue/Saturation, go to Image> Adjustments> Hue/Saturation or press Ctrl+U and apply these following setting: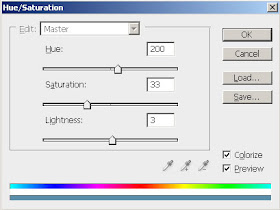
Step 3: Duplicate the layer by pressing Ctrl+J and go to Filter> Blur> Gaussian Blur and apply these settings: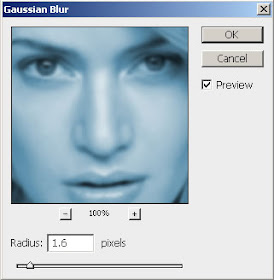
Step 4: Set the layer blending mode to 'Overlay'.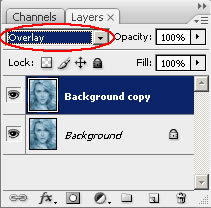
Step 5: Merge the layers together by pressing Ctrl+E. Again duplicate the layer and go to Filter> Blur> Motion Blur and apply these following setting: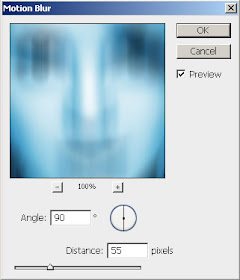
Step 6: Set the layer blending mode to 'Overlay' and merge the layer together.
After this your Image looks like this: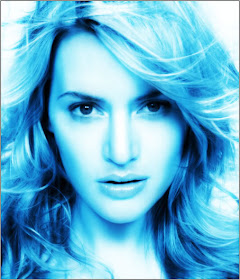
Step 7: Create a new layer and fill with white using Paint Bucket Tool.
Set this layer mode to 'Overlay' and do not merge.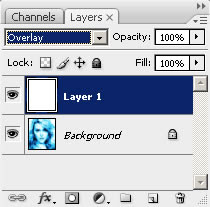
Step 8: Press 'D' to reset your color palette. Set your foreground color to #000099 and background to white. Create a new layer and fill with this color (#000099).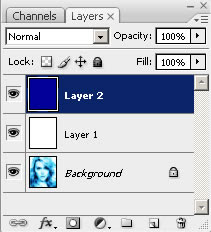
Step 9: Go to Filter> Render> Clouds. Set the layer blending mode to 'Overlay' and Opacity on this layer to 57%.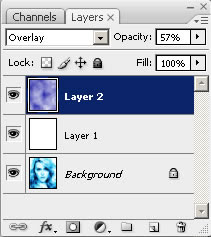
Step 10: In this step create a new layer again and fill it with white. Set the layer blending mode on this layer to 'Difference'.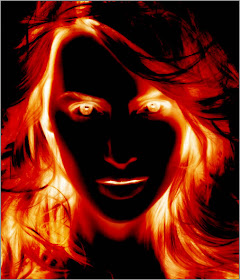
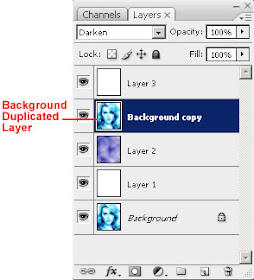
Step 11: In the Final step duplicate your background layer. Move this layer to 2nd from the top under white layer and set the layer blending mode to 'Darken'.
Here's is the Final Result!:
17 comments:
Very good effect and easy to follow
Dave
Is really cool, thanks...
doesnt work..suxs..
Works perfectly! Good one!
nice effect, worked perfectly & was really easy to follow....thanks.
Thanks for the tut.
Doesn't work. Sucks pretty bad.
Works fine, great. For those who says it doesn't work, it just means you failed
i'm going to try this one..=')
WOW! Brilliant post. I am speechless to see this. Awesome!
Great Post.Thanks sharing!
An absolute graphic art by you and thanks for sharing the way how to do that.
Here I am again and would like to thank for your post.
Thanks for nice post...
A good presentation of something new is always helpful for others.
Lovely tutorial. It helped me a lot. Thanks
Raster To vector/clipping path service/Background Removal
Thanks for the insights! They are always helpful and well-presented.
Post a Comment